Life Montage Instructions

Life Montage Instructions

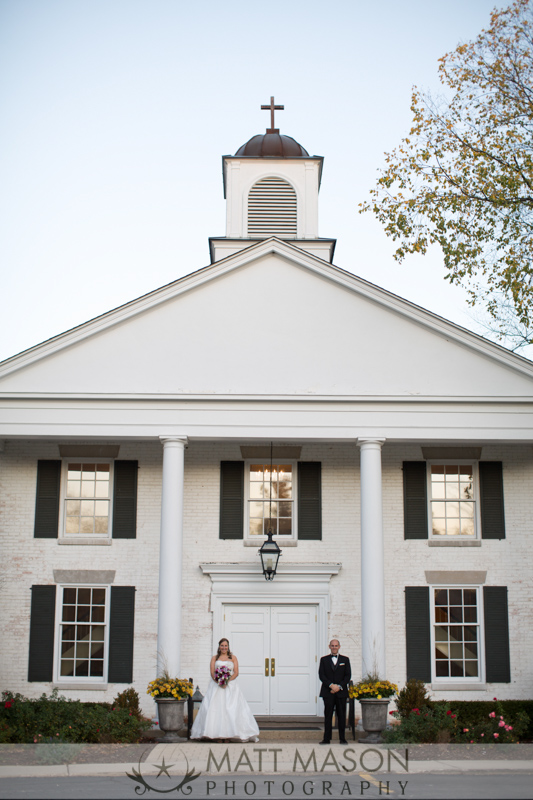
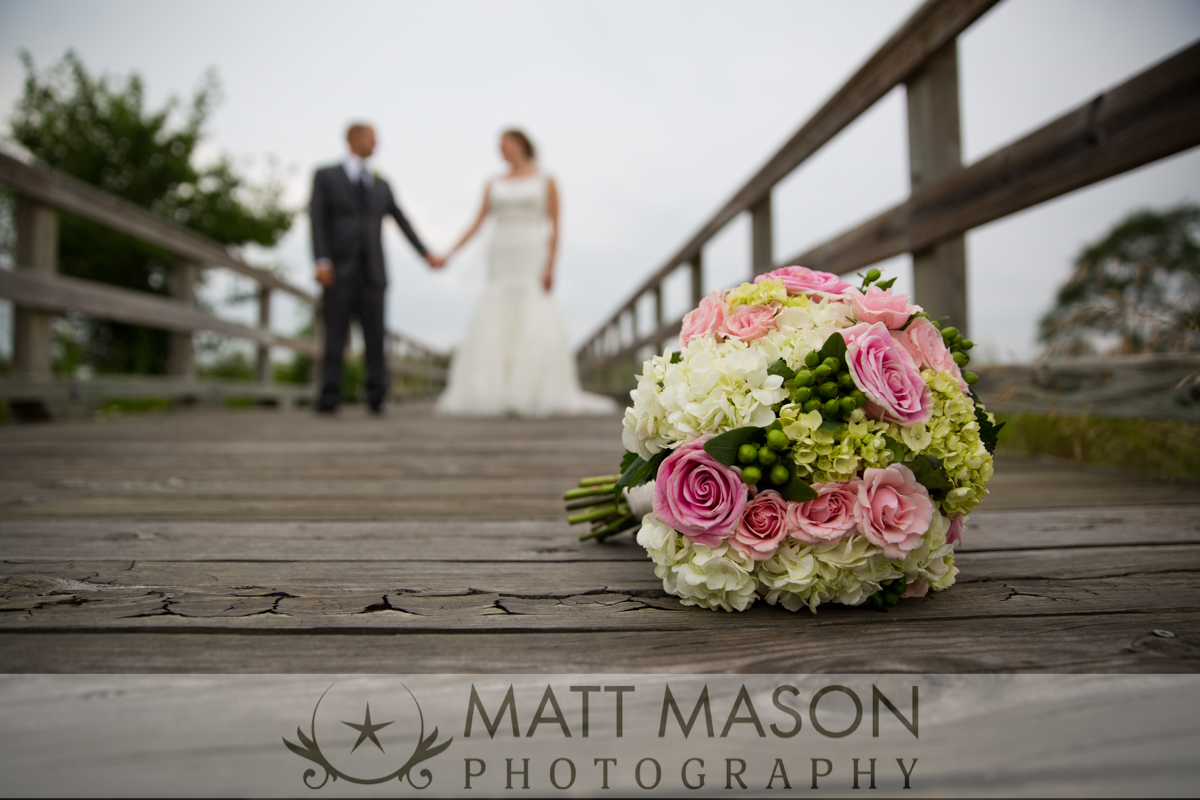
If you have a Life Montage in your package (i.e. Mainstream Montage, Fusion Film or Cinema Film) please follow these instructions in order to get the most out of this fun and exciting part of the reception. We need this no later than 30 days before your wedding.

Please scan up to 75 images you want us to display as part of the family photo portion of your slideshow. We recommend 25 from the bride’s growing up years, 25 from the groom’s and 25 from together photos and/or friend photos. Please make sure you name them in the order you wish to have us show them. This is how we request you name them: 001.jpg, 002.jpg, 003.jpg …. 024.jpg, 025.jpg….075.jpg. (Please do not name them any other “creative” way.)

Here is a very helpful and efficient free program to scan the prints: https://www.google.com/photos/scan/. If you use a scanner please make sure you scan the photos right side up and keep them square so you don’t add whitespace around the photos. File sizes should be a minimum of 150 kb and preferably bigger.  (1920 pixels on the longest side is large enough.)  The image should fill your screen when you preview it on your computer.  Otherwise the image will look pixelated when viewed.  Please upload via Google Drive and send the entire folder to my account at: matt@mattmasonphotography.com. (It is easy to accidentally send a single photo so please give access to the entire folder the photos are in.)

Note that we have our own computer, projector and screen and this comes as part of the service we provide for you. We prefer to use our own equipment for showing the slideshows whenever possible. This helps ensure a quality experience. If your venue has a requirement to use their equipment please let us know.

We have a cable to goes out of our headphone jack to a converter into the DJ or bands mixer as RCA or 1/4 Inch music cable. Please check with your Band or DJ to make sure they can accommodate these options. We provide music we have paid for the right to use and publish to the Internet.  


Developing your wedding day timeline

Developing your wedding day timeline

As a wedding photographer in Lake Geneva, Wisconsin, one of the areas of wedding planning that can make the biggest difference for the final album is the wedding day timeline.

Here are some issues to think about when developing your timeline:

  • First Look
  • Greeting Guests (Most of our clients do not do this)
  • Distance between ceremony and reception locations
  • Family Photo Session
  • Cocktail Hour
  • Garter and Bouquet toss

Cycling: adventure for a lifetime

Cycling: adventure for a lifetime

The fresh smell of a pine forest, thrill of adventure, feeling of accomplishment, clearing of your mind and soul, experience of God’s creation, exhilaration of the runner’s high, excitement of setting a personal best, making new friends, reconnecting with old friends, fostering your most important relationships, finding a new way, testing the limits of your body.

Cycling for me is a lifelong endeavor that has kept me physically and mentally sharp. It is a sport I plan to continue throughout the rest of my life. It has always been the base of fitness for other activities. I love that all skill levels can participate and friends can all do it together and meet up after a ride to hang out. There is a renewal in your spirit that takes you back to the time when you were a kid and your bike represented freedom and independence.

Cycling is enjoyable to sometimes run errands on a bike rather than a car. My wife and I enjoy making it part of an adventure to visit new and different breweries or to experience a new city by cycling around the trails. Madison, Austin, Topeka, Switzerland, Delavan, East Troy, Lake Geneva, Steven’s Point are all places we have explored in a special way because we did it on a bike.

Mountain biking, in the last decade, has become one of my biggest passions and hobbies. It combines my love for cycling with a love for experiencing nature first hand. Now using Strava I am able to track with GPS my personal progress and personal bests and now even compete with thousands of other athletes on countless segments. There are very few accomplishments more satisfying than finding yourself in the top 10 of hundreds of others or even making King of the Hill. One of the most compelling parts of this sport is that it something that you can do at any age. I remember seeing a group of 80 year old ladies in Switzerland biking together on their bikes like it was a daily activity for them. A lifestyle of fitness. I say all the time I am training to one day be the fastest 70/80 year old in my age group.

I recently read this article by John K Coyle. Here is the link. He makes a compelling case for why cycling is the "greatest sport in the world." I couldn’t agree more whole heartedly.

Maybe you have considered taking up cycling but needed a little push. Do it, you won’t regret it. Maybe you aren’t ready to be outside yet. Maybe get a Peloton. (Indoor streaming cycling classes that will blow your mind!) Here is our referral code to get $100 of free stuff when you buy your Peloton bike: BTVYFP. The email associated with the code is caheidke@gmail.com.

In just the last couple of years here are photos I shot on my iPhone or compact camera from just a few of my adventures on a bike. My wife is pictured in many of the shots as well as one with my friend Jake and one on the podium in my age group in a mountain bike race.

Preparing for Your Rockstar Engagement Session

Preparing for Your Rockstar Engagement Session

As you prepare for your wedding day photography one of the best things you can do with your photographer is have an engagement session.  Some of the benefits of doing an engagement session are:

  • You get to know your photographer better.
  • By practicing some key poses you are better prepared for wedding day photography.
  • This session will help you feel more comfortable in front of the camera.
  • Of course, you will receive lots of fun photos to remember your courtship.
  • Many people use the photos in their save the date cards or for additional printed material on wedding day.
  • It is lots of fun.  Just look at some of the photos below.

With all these benefits in mind it makes sense to plan accordingly to get the most out of your engagement session.  Here are some points to ponder if you are planning your engagement session with Matt Mason Photography:

10 tips for How to Take Great Photos with Your Cell Phone Camera

10 tips for How to Take Great Photos with Your Cell Phone Camera

You might be surprised to know that even as a professional photographer, I often go on vacation without my big, professional camera. Depending on the situation I might pack my digital SLR, but there are times I like to rely on the very powerful camera at my fingertips – my smartphone. Carrying around another camera is often impractical and can weigh you down. If you find yourself wanting to just use your lightweight, convenient smartphone to take photos then read on.

In full disclosure, I am an iPhone user so most of my experience with smartphones comes from this perspective. Not surprisingly, though, after researching this article I learned that all of my favorite camera tips for iPhone apply to Android devices as well.

  1. SHOOT PICTURES WITH LIVE PHOTO TURNED ON

How many times do you walk away from shooting a group photo and realize that Uncle Larry had his eyes shut again? Fortunately, iPhones have a great feature that allows you to shoot a mini hi-res video around the photo you shoot. You’re then able to edit and choose another frame where Uncle Larry has his eyes open.

How it works:

• iPhone: Make sure Live Photo is turned on in camera mode before you take a photo. It is the middle option at the top of the screen. When you are viewing the picture, click Edit. You’ll see a smart slider showing multiple hi-res shots. Click on the one that you like best and select Make Key Photo.

• To activate on an Android: Open your camera app, tap the gear icon. Then, scroll down and make sure "Motion photo" is enabled.

This was captured on a hike in the Smoky Mountains.

This was captured on a hike in the Smoky Mountains.

Using Live Photo use the Smart Slider in edit mode select the frame you like best and select Make Key Photo

Using Live Photo use the Smart Slider in edit mode select the frame you like best and select Make Key Photo

2. USE THE SUN AT YOUR BACK

When the sun is a factor, you will create more beautiful images with the sun at your back and the scene all lit up. When you shoot with the sun in your face, you will tend to get washed out photos. However, if you “hide” the sun behind something, you can create some interesting silhouettes, especially if your goal is to create more artistic photos. Here are shots illustrating a bright blue sky a silhouette.

Mountain bike trip to Sedona, AZ

Mountain bike trip to Sedona, AZ

Hide the sun on a bright day and create silhouettes. Sedona, AZ

Hide the sun on a bright day and create silhouettes. Sedona, AZ

3. TOUCH THE SCREEN BEFORE YOU TAKE THE PICTURE

While smartphones are amazingly intuitive, they can’t read your mind. The camera will try adjusting a scene and can cause frustrating results that are out of focus and over- or under-exposed. These tips will help you get the image you originally had in mind.

Better Focus: Sometimes you want to have something in the foreground in sharp focus and the background a little blurred. Just touch the part of the screen you want in sharp focus before taking the picture.   

Better Exposure:  It can be a challenge to get a beautiful sunset photo when your phone keeps trying to adjust for the bright sky or dark foreground. When you touch the screen in a particular area it locks the exposure in before you take the photo. Touch the screen in multiple places until you get the ideal exposure for your photo.  
(SAMPLE PHOTO- Sunset on Lake Mendota in Madison, WI and SAMPLE PHOTO-Sunset in Malaga, Spain)

Use Pro Features: The Samsung I tested for this article had a built in “Pro Mode” that allows you to control all the features of the camera. For advanced users this can create amazing results.You can control shutter speed, ISO, aperture, white balance, etc. For iPhone you may want to download an app. I like Camera+2, which can be a game changer when you want to get more creative than the phone’s camera will allow. Note that Apple has a fixed aperture so there are no controls for it.

Sunset on Lake Mendota in Madison, WI

Sunset on Lake Mendota in Madison, WI

Sunset in at the harbor in Malaga, Spain. Hide the Sun and touch the screen to lock in what you want the exposure to be.

Sunset in at the harbor in Malaga, Spain. Hide the Sun and touch the screen to lock in what you want the exposure to be.

4. EDIT YOUR PHOTOS

Select the photo you want to edit and click on Edit. There are three icons below the photo. I will go through them briefly, and the tips apply to both iPhones and Androids. The menus are slightly different and perhaps more intuitive on a Samsung interface.

The first edit option straightens the horizon. You can also crop the image here. 


The second edit option is a series of pre-set filters. You can click on the different frames until you find the one that you like and hit save.


Sometimes the pre-set filters aren’t enough.  When I edit photos I try to make the image seem as natural as possible.  I rarely add funky colors or strange filters.  Fixing photos are more about color and lighting.  I rarely like to use filters that make a photo look unreal, unless it is the only way to save a picture that is important to me. Remember, you can adjust light, color and black-and-white settings which can make your photos more bright, vibrant and artistic. Here are the ones that I recommend and use the most.  The most important rule is to not overdo it with the smart sliders and templates.

    • Light

      1. Exposure:  
        Smart Phones have pretty amazing technology and create images that are great often as is.  But sometimes they turn out brighter or darker than expected. This smart slider can really help.

      2. Shadows:
        In a similar way adding a little brightness to the shadows can help a photo but don’t get too carried away or your image will look pixelated.

      3. Contrast:
        I sometimes like to add some contrast after applying other edits.

    • Color

  • Cast:
    Occasionally a photo will look too blue or too yellow.  This Smart Slider will help make the white balance look more natural.  But keep in mind that you don’t have to move it much to make a big difference.

5. DON’T BULLSEYE YOUR PHOTOS

When you are shooting a scene, your primary subject or point of interest should be in one of the corners of the frame to make it more visually appealing. Notice the grid that helps you frame the shot. When shooting scenes, the horizon should be on the top third or bottom third of the image.

On the other hand, when you have a group of people in a photo it makes sense to center them but still pay attention to the horizon. You don’t want the horizon to be centered if you can avoid it. It should be at the top third of the scene or the bottom third. Also, try not to have the horizon split through subjects’ heads.

Imagine a tic tac toe grid and try to have your horizon on top third or bottom and your subject should be along one of the intersections of the grid. (Shot at the Grand Canyon)

Imagine a tic tac toe grid and try to have your horizon on top third or bottom and your subject should be along one of the intersections of the grid. (Shot at the Grand Canyon)

6. USE A REMOTE TRIGGER OR TIMER

Apple Watches and Samsung Galaxy Watches have the ability to trigger the shutter button on your phone. Using this remote trigger is a nice alternative to the famous “selfie.” It can allow you to get more of the scene and tell a better story. I find it’s better to use the three second timer on my watch, so I have time to take the picture and pose. If you don’t have a smartwatch you can also set a timer on your smartphone and get into position. They also make aftermarket Bluetooth remote triggers to work with any smartphone.

Use a remote trigger or timer like the Apple Watch to capture photos you might otherwise not be able to get. Shot on vacation at Red Rock Canyon

Use a remote trigger or timer like the Apple Watch to capture photos you might otherwise not be able to get.
Shot on vacation at Red Rock Canyon

7. USE SHORTCUTS TO CAPTURE THE MOMENT.

On the iPhone swipe up from the home screen to get to the camera quickly without having to use your password. Getting your camera out fast can be the difference between capturing a moment or missing it. You can also get more out of your shooting experience by using the volume buttons as a shutter release instead of just the white virtual button on the screen. On an Android you can also quickly launch the camera application by double-clicking the home key, or by using the lock screen shortcut.

8. CHANGE YOUR PERSPECTIVE

Often a basic photo will turn into a work of art just by changing your perspective. It might mean climbing to a peak or getting down on the ground to make your image come to life.

Change the camera perspective to create more artistic images. (Shot at Lake Geneva Canopy Tours in Lake Geneva, WI.)

Change the camera perspective to create more artistic images. (Shot at Lake Geneva Canopy Tours in Lake Geneva, WI.)

9. WHAT ABOUT FLASH?

My experience with the flash on a smartphone camera is generally not good. I prefer to find better lighting whenever possible, so you are not completely dependent on the flash for your light. Another option is to use another person’s smartphone flashlight feature. Just make sure to have the light off center and above the camera taking the picture so the light doesn’t make the subject look like a deer in the headlights.

10. USE THE PANORAMIC FEATURE AND CAPTURE MORE

One of my favorite features of my smartphone camera is the ability to make beautiful panoramic images. You will learn fast that you should hold your hands steady and turn slowly from left to right to get the best images. You might have to edit or reshoot if you are too unsteady.

Use the pano feature of your smartphone to tell a more interesting story in one frame. Shot on vacation from our hotel room outside of Plaza de la Constitución.

Use the pano feature of your smartphone to tell a more interesting story in one frame. Shot on vacation from our hotel room outside of Plaza de la Constitución.

Below are some more smartphone photos you can see to provide more inspiration.

As you can see there are several ways to get the most out of your smartphone camera. Give these tips a try and most likely you’ll leave might that big, heavy camera behind the next time you head out of town.

Matt Mason is a Lake Geneva-based photographer and owner of Matt Mason Photography. Matt and his team are well known for photographing weddings as well as shooting family, senior and corporate portraits, and video productions. Matt and his wife, Cindy, photograph destination weddings together and travel throughout the country and the world shooting photos for pleasure.

Memorable Wedding Day Moments

Memorable Wedding Day Moments

  There are countless moments on wedding day that you don’t want to miss.   Proper planning leads to capturing the right moment at the right time during your big day.  Here are four key moments to consider integrating into your wedding day.  

(1)  Gift Exchange/ Hand-Written Note

    We wish this happened every wedding.  Some couples take the time before the wedding to plan a special gift or note exchange.  One bride had kept a gum wrapper from high school that her sweetheart had written on and gave it back to him on wedding day.  Sometimes the most powerful gift is a simple letter expressing your love for the other and excitement about the day. 


(2) First Look For the Bride and Her Father

        If you have a special bond with your father, we recommend a “first look” with dad.  It will obviously happen at some point during the wedding day and it planned for, makes for some beautifully emotional images. 


(3)  Grand Exit

    There are a lot of creative ways to have an exit after the ceremony.  There aren't many other moments in a wedding day that can top the emotion found here.  If there is a way to work this into your ceremony, we definitely recommend it!


(4)  Bride & Groom First Look

       We could give you a hundred reasons why we think you should do a first look before the wedding day.  Let me just share my number one reason--try to look at these photos and not love them.

2015 Best-Of Romantics

The Romantic Session is one of the most important parts of a successful wedding photography experience.  It is also potentially one of the best times of the day that we can get creative with lighting, backdrops, and poses.  Below are some of our top favs from 2015 weddings.


2015 Best-Of Details

Details are so much fun for us to shoot.  Every wedding has something unique and interesting to be highlighted.  Here are some of our favs from 2015.


2015 Best-Of Silhouette

At MMP we are suckers for a good silhouette shot. Here are some of our favorites from last year. If you know of one that is missing please remind us. We go through over 80 weddings when we are looking for our best of images so we could have missed a few!


Best-Of 2015 Humor

Many of our clients are drawn to the lighthearted fun we have with with the wedding party.   Here are some of our 2015 favorite fun shots.